Inserting Images in the Forum


|
|
This post was updated on .
POSTING IMAGES:To insert an image in your post: 1. Place the cursor where you want the image to appear 2. Click the "Insert Image" button on the toolbar above the edit area. 3. Complete the dialogue that appears remembering to select the options that resize the image and place it to left, right or centre, as appropriate. (There's information about image positioning and file size below!) 4. Click the "Insert Image" button at the bottom of the dialogue. 5. Wait! - There is no progress bar or other indicator that the upload is taking place so depending on the speed of your connection and the size of the file it may take up to half a minute to make the upload. NOTE: If the file is larger than 5Mb AND you failed to select one of the "Resize" options you will see a warning dialogue: 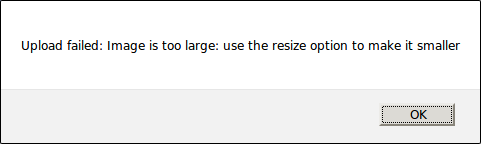 Once the upload is complete the dialogue will disappear and you will see a link in the form: <nabble_img src="myphoto.jpg" border="0" alt="My Photo Described"/>inserted in the message where the image will appear when posted. Some people have said they find it difficult to get the image to go they want it. The following may help you understand how to position an image. IMAGE POSITIONING:This follows the standard HTML rules. (HTML is the computer language used to build web pages.) 1. By default, images appear "in line". (The "Float: None" Setting) When inserted, an image behaves just like the next letter typed in a word. Obviously it will be much taller than a normal letter so forces the lines of text apart in order to accommodate itself and it will cause word wrapping if it is so wide it would go beyond the end of the line. If using the default positioning, it is recommended that you hit the carriage return/enter key a couple of times before and after inserting any image to ensure that the image starts on a new line and no text will continue from the bottom right corner of the image. 2. Images can be set to "float" (The Float: Left/Right Setting) Floating takes an image out of the "normal flow" (to use HTML jargon). It appears to the left or right at the position it was inserted. Any following text then fills the space to the side of floated image and otherwise continues in the normal flow of the page's content. In general, therefore, it is recommended NOT to use "Float Left/Right" unless the image is to be displayed at one of the smaller sizes offered and a good quantity of text follows the image. There needs to be sufficient text flowing beside the image to reach fully past the image and return to occupy the full width of the space available. If it doesn't, then any following images can begin to catch on the earlier ones and it all gets very messy. 3. Images can be displayed centred (The "Float: Center" Setting) In HTML terms the image is being displayed as a "Block" and that block is then centred within the space available. As a block nothing can be displayed or flow to either side of it. This is probably the best setting for most people to use. Text before the image will stop as if the end of a paragraph. Following text will start on a new line. However, note that images which are wider than the available space will be truncated and only show the left hand portion. IMAGE SIZE:Photos uploaded direct from a modern camera often exceed the 5Mb file size limit and after a long wait you'll get the error message shown above. Of the three sizes offered in the Insert Image dialogue, the largest (750px) will fill most of the full width available even in large windows, consequentially it is best used in conjunction with the "Float: Center" option (as described in IMAGE POSITIONING above). The smaller sizes (250px and 500px) are best suited for images to be floated left or right. Images wider than 750px will be truncated and only show the left hand part, so you should always choose one of the three sizes above unless the file you are uploading, or linking to, is already below this limit. If you wish those reading your post to have a copy available for best print quality then use the file upload facility (on the "MOREv" menu) rather than adding it as image. This allows files of up to 5Mb in size to be uploaded. The file will appear as a link in your message. Readers will be able to right-click on it and choose the option to save it to disk.
Greg Chapman
GregAfloat - My Boating Biography |
«
Return to Announcements and FAQs
|
1 view|%1 views
| Free forum by Nabble | Edit this page |