Pippin Restoration


|
This post was updated on .
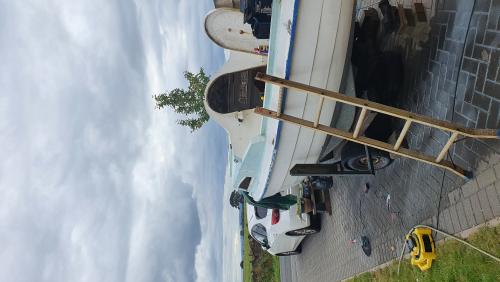  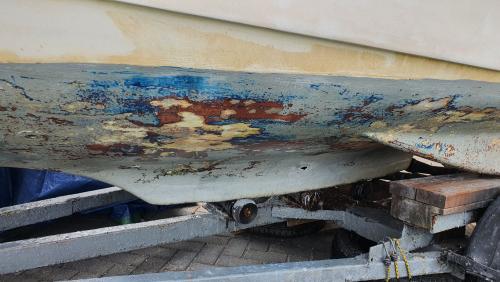 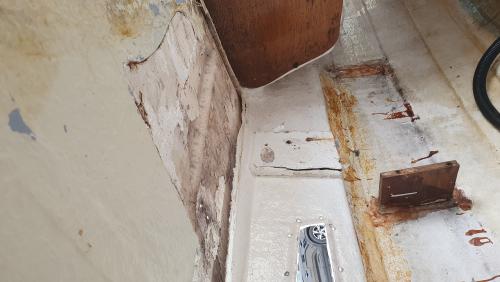  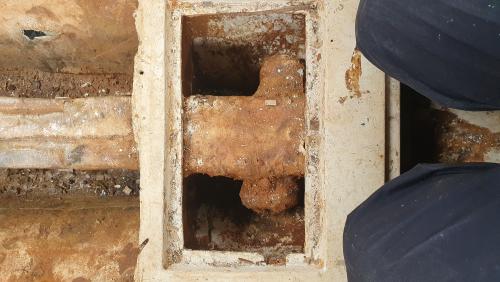 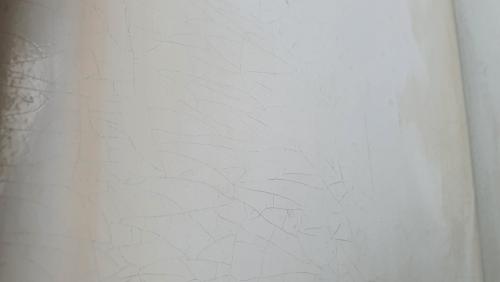 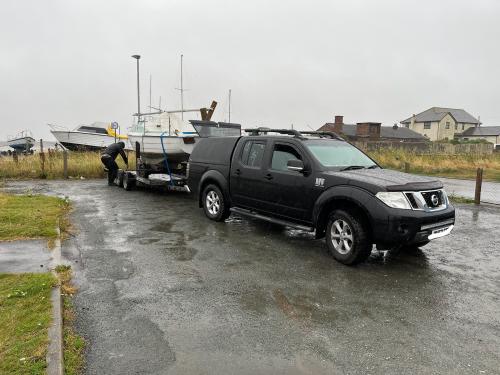 Hello Seahawk Community, Opinions, knowledge, ideas, concerns, suggestions and what have you, are all kindly requested if you'd please. Poor Pippin is in a sorry state and I wish to bring her to life once more. I have identified some common issues and wish for anyone's thoughts on anything to help me moving forward. I have trawled through this site and gained a wealth of knowledge though I am hopeful enough people still frequent this site to see this post. I am particularly interested in speaking with any previous owners of Pippin to help me understand her history and previous repairs. Following on from my introduction, I have brought Pippin home to work on her. Sadly I don't have the luxury of indoor storage. Her ballast has been removed. It was loose rusty iron in water. Some of the iron has been pushed into plastic milk bottles. No concrete in sight. The wood bracing to the rear of the keel casing has rotted. The keel has been sealed underneath and at this stage I do not plan to open it up. The keel bolt has been fiberglassed. Some fiberglass had been roughly stuck to the inside of the bilge. On removal, as it was peeling away, a small hole became exposed which I'm sure I can fashion a decent repair. I suppose I'm best using concrete to secure the iron back in, making no room for any water to collect down in there unlike the pool it was before? Or if anyone has any alternative ideas? Should I leave it loose and some how have a pipe secured at the bottom of the iron pile that can be linked to a bildge pump? The iron alone, I need to weigh, but probably is not enough without cement, right? The rotted balsa has been removed from a few areas of the coach roof. I think it will be easier to replace with foam. I am aware foam will not last as long as Balsa long term. But Balsa fails if moisture gets in anyhow with foam been easier to apply to miss shaped holes. The lockers are removed and with the space they make available I'd sooner put some doors on the holes than put the lockers back. Any idea how best to fabricate a door that can be rainproof/somewhat water tight? The pre-made inspection hatches do not come long enough from my research. There is crazing in the Hull. I have sanded some of it and it goes quite faint. I read conflicting views but in all it seems I should not be overly worried as long as the Hull is solid, which it is. I will be painting it with that epoxy paint stuff - the gel coat thing that goes off very quick when left in a pot. Excuse my terminology. I understand if I do a half decent job I should be able to buff the hull to some sort of shine. If only, I dream. I found a little delamination in a corner if the cockpit floor next to the cabin. Now on drilling the underside the wood seems dry, so I do not believe there is water in there. It seems solid. The trailer is knackered, a complete rusty piece of (s)crap. It was brought here, boat trailer on car trailer. I still need to buy a decent outboard, so any suggestions on how to get or adapt a cheap trailer would be great. It is not a priority but a concern. Anyone have any tails to tell on trailers and rough prices? Electrics. I would like to add a battery and nav lights (not that I really need them), cabin light and USB charging point. The price of this is off-putting for now, particularly as the new Parsun 4hp outboard I have found does not have an alternator. Probably one of the reasons it's cheaper than the competition. Again, anyone any suggestions on electrics from experience? Windows have been removed for replacement. Cushions need complete new ply, foam and lining. Ply cabin floor needs replaced. Everything pretty much everywhere needs sanding and painting. The headlining will be half recycled with new fabric. This will hide my ceiling patch work. Nearly all lines and sheets will need replaced. The sails will be fine for now. Existing tap to be utilised with new tank for pot wash and kettle. I intend to fit some nice furnishings to give her a cosy feel (I mean line the inner Hull, maybe a fake wood cabin floor and some wood in the cockpit floor, and anything else the better half jas me do to convince her to overnight). Any other ideas, concerns or anything from the opening of this post, please please do shout up. Many thanks, Michael
Michael
Pippin #120 - Ullswater, The Lake District |
|
|
Hi Michael,
Wow, you have an even bigger job than I do... Great you take it on. These boats deserve it! My suggestion on the ballast is that it would be important to have the correct weight back in and seal it so no water can collect in that area. You want that to accumulate in the bilge only. I had some leaks in the bilge too, just repaired recently with generous epoxy and fiberglass. I think it is a good idea to make that area solid too! I'll try to post some pics of my repair to the coach roof, like you say, I opted for foam, very easy to work with. Looking forward to seeing how you get along! It motivates me too to keep working on this great boat! Best wishes, Bobby |
|
Administrator
|
In reply to this post by Countrysideguy
Hi Michael,
The first thing to say is that I would love to have full size copies of your images for my archives, especially those (or any more you have) showing the keel emptied of ballast, so I could provide a better collection of image for the page at: https://www.seahawk17.org.uk/owners-maintenance-fittings-keel.php Use the link on the Contact page to send them. As you might expect once they have sold their SeaHawks, most owners have their next boat to worry about and only visit rarely, if at all, so tha chances of getting horse's mouth information will not be good. My boat was a later model with sealed ballast and I have not been sent any photos showing the cabin sole removed although I know a couple of owners have done that in order to make the repair you plan. It means I only have the photograph on the page linked above to show where the forward bracing was sited and noting to show where the aft bracing was sited. I have never had to tackle the repair you are undertaking, so I'm not speaking from experience. However, given that all the hard work of removing the ballast has been done, it would seem silly not to take the opportunity to complete a full keel restoration. Why do half the job and end up with a boat that that will not sail as well as it should and when you eventually part with it certainly be worth almost infinitely less than the value of a properly repaired one. I would remove and GRP from around the bolt, which I suspect was done because some previous owner had no idea where the true site of any leak was. I'd ask at a boatyard used to dealing with swinging keels how to go about resealing the pivot point and as Bobby has suggested refill the keel with sufficient to give the boat the proper weight of ballast. I do not recall anyone reporting on what they have done when replacing failed balsa in the cabin roof. I cheated when I created a two-part cabin door: https://www.seahawk17.org.uk/owners-custom-cabin-splitdoor.php#twopart Later when I had Just 17 resprayed what was left of the balsa was replaced with plywood. See: https://gregafloat.org.uk/seahawk/2011-07repaint.php#08jul11 I'm not certain why balsa sandwich was used in so many boats. My assumption is that it helps with insulation and can provide a panel that is considerably lighter than solid GRP but with similar rigidity if the GRP is properly bonded to the balsa. Is it possible that sheets of expanded polystyrene foam is the modern equivalent? You may be aware that the last few Moore's boats and those built by Mistral Craft came with off the peg hatches rather than the large "bins" Pippin had. You may be able to find a hatch of appropriate dimensions but more likely you may have to source a "blanking plate" to fill most of the hole in the cockpit and find a smaller hatch to fit to the plate. The Mistral Craft boats had to meet the RCD regulations, and they internals of their cockpit lockers had to be kept completely sealed from the cabin. Just 17's had some very minor crazing when I came to prepare it for a "respray", but I was told spraying was not necessary. I didn't feel up to using two-pack paint. Hence I got a professional to do it. It was brushed on but the result was superb and looked sprayed to my eyes. My boat came with an adapted powerboat trailer. The keel stood twice the height above ground than with it would have with a standard SeaHawk trailer. It only took me a couple of launches to realise how much more hassle that created on launching or recovery. You need twice the depth of water on the slipway before the boat will float. I'm too out of touch with prices to advise, but getting the lowest possible trailer is key to an easy life. My experience is with an electric outboard, powered by 85A/h battery, recharged from a solar panel, that also ran nav lights and had as 12v cigar lighter socket into which I plugged a USB socket. To give you an idea, see: https://forum.seahawk17.org.uk/SOLD-Just-17-267-Nr-Stalham-Norfolk-td4025006.html You'll have seen my experience (from 2006) at: https://www.seahawk17.org.uk/owners-maintenance-fittings-windows.php When I had the repaint done (in 2011) the aluminium framing was painted black and I used nut and bolt to refit them after my bad experience with pop rivets. I had always assumed that people having to carry out ballast replacement would cut out the cabin sole as a single piece and be able to refit it later, but your pictures suggest that the floor may be attached to the top of the keel casing meaning the floor would come out in a minimum of two pieces and in reality as a lot of scrappy fragments. Does it look that way to you? I have always imagined that if you removed the inner skin of the cabin roof it would be easy to clean off any old balsa clinging on then, afer gluing expanded polystyrene sheets to replace the balsa it would be easiest to buy what I used to surface my galley worktops. Maybe I am lucky but there are a number of upmarket yacht builders on the Broads, I went to one of them and picked up some formica off-cuts left over from luxury galley fit-outs at a ludicrously low price. Glue them to expanded polystrene sheets, supporting them with a number of props wedged betwen bunks, floor and ceiling and finally make good the joins around the edges of the formica with a little chopped strand matting and resin. In my head I pictured having "plastered" cabin ceiling rather than an "artexed" one. Those I've spoken to who acquired SeaHawks whose previous owners had fitted water tanks always wished they hadn't got them. Keeping the insides clean and smalling fresh seemed to defeat them and they ended up having to bring additional bottles for drinking. While I always pondered whether I should get a 1970's caravan-style hand pump tap fitted to my galley I found that carrying water in a couple of 5ltr jerry cans served me very well when weekend cruising. They were small enough to fit in the space under the "cooker shelf" with a lot of other stuff. Just 17 came with some very thin lightweight loop piled "carpet" glued to the hull above each berth. That worked for me, as I then sewed strips of Velcro hooks to the back of the ex-caravan seat/bed cushions that also came with her. This was sufficient to keep them in place as backrest cushions at all times when sailing Just my thoughts. Every sailor is different and my ideas may not work for you and as you see, some are untried by me.
Greg Chapman
GregAfloat - My Boating Biography |
|
|
In reply to this post by Countrysideguy
Hi all,
Here are some pics of balsa core I removed. It was pretty saturated with water; should have paid more attention to have leaks that do not trickle inside the cabin. But hey, you learn along the way... I replaced the balsa with polyurethane hard foam, easy to work with. Filled the gaps, and finished with epoxy, fibermats, and then filler. The last pics are showing current status; still have to fair and paint, but got impatient and wanted to sail before the season ends. Under the darker area sits some hardwood that spans the roof. With the mast support I am hoping it is much more solid than having foam in between. 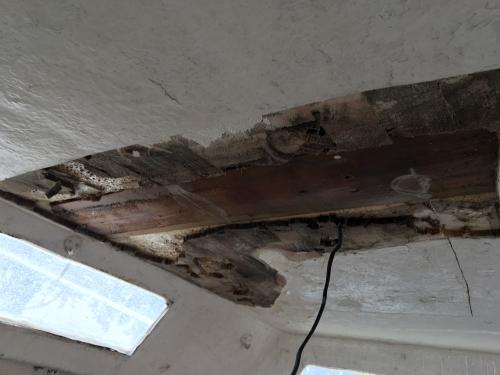  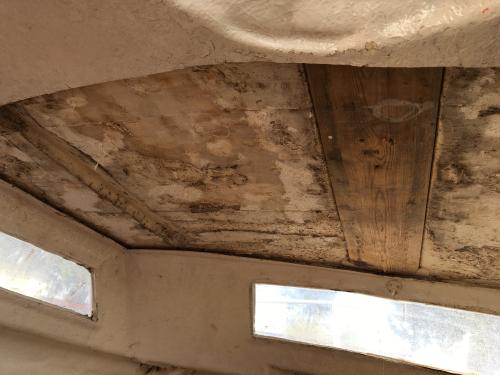 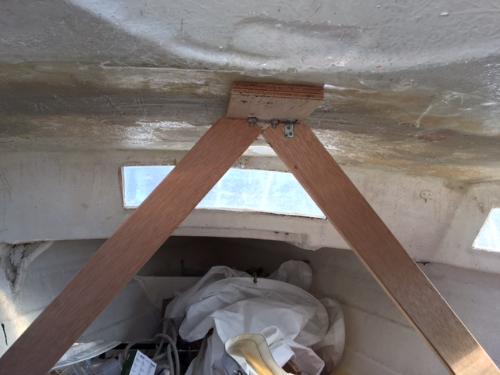 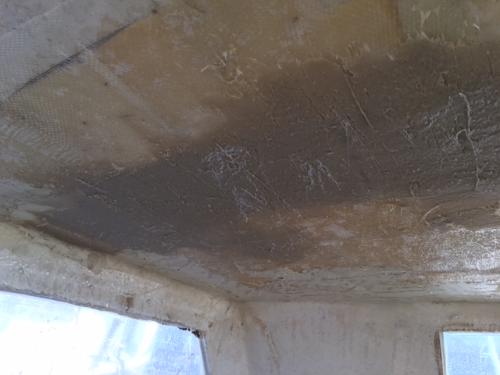 Best wishes, Bobby |
|
|
Thank you Bobby.
It is people like yourself on this site which led me to purchase Pippin, knowing that I coul have made life much easier by spending more on a groomed vessel and saving the work. I will concrete the ballast in. Maybe post mix will work well. I shall also try to get this to the right weight, somehow. Thanks for the help with the roof. It fills me with a great deal of confidence. You have made it look very easy. I have not removed under the mast foot as it is solid. But the idea of the hardwood across the beam of the boat strikes me as genius.
Michael
Pippin #120 - Ullswater, The Lake District |
|
Administrator
|
In reply to this post by Bobby Koeleman
Hi Bobby,
Can I also put in a request for "direct from the camera" copies of your images too. I am keen to get such material copied to the main site as I am concerned that anything stored only on the forum could go missing. The host nabble.com has not been reliable in recent years with features slowly being withdrawn often without notice. As a result I am hoping to introduce alternative forum software that I would host and would be able to pass on to another webmaster when I retire. (At 74 years of age, and having sold my own SeaHawk over four years ago, it's time I considered the long term future of the site and find someone to wait in the wings ready to take over.)
Greg Chapman
GregAfloat - My Boating Biography |
|
|
In reply to this post by GregSeaHawk
Greg,
I have emailed you a few snaps. I promise I shall get more and better photos for you. I do really want to sort the drop keel, but feel I have so much work to do already, with little time here and there. I also have no idea how I can lift the boat enough to cut it open and get the keel out. I can’t trailer the boat anywhere without hiring a car trailer. So am limited to my drive. Perhaps if I fashion some way of removing the trailer but the rollers are seized. But I do wholeheartedly agree it would be wise to fix the keel which is why I feel reluctant to set the iron in concrete. I will look jnto your suggestion for the lockers. It makes sense. Do you have a suggestion of what to use as a blanking sheet? Plastic sheet seem quite expensive, particularly to cut a hole into. Do you think marine ply, either painted or varnished could be used? Love the idea of the old caravan cushion and it looked great on yours. Pippin had shelving but I think back support is a must. Pippin also had carpet on the hull side. Definitely worth me replacing. The cabin floor has probably been cut out in a few peices and I doubt whoever did so ever intended to put it back in. I have no idea if it would have been sealed to the folding keel top but it would have certainly made contact with it. The balsa in the remains of the original floor is as good as wet tissue paper. I will foam in the gap between the layers, but with a ply floor on top it is solid and easily removable. Albeit 6mm headroom is lost. Pippin's headlining has been fitted to thin ply, complete with some wood trimming which looked quite neat. It would be a shame not to restore it. Again, it eats away at a good 15mm headroom though. I saw a trailer on the south cost for £300. Would have been perfect, just wrong time for me. But if there was kne, there will hopefully be another some day. It was a low one and could have been easily adapted. Thanks so much for your help!
Michael
Pippin #120 - Ullswater, The Lake District |
|
Administrator
|
Hi Michael,
Thanks! Received. I wish I had more information, but the only clues I have for your situation are found here: https://www.seahawk17.org.uk/owners-maintenance-fittings-keelseaholly.php Marine ply would seem as good as anything. Just bear in mind that when heeling under sail it may need to take a good part of your weight. The hatches I fitted to my Reedcraft bins were 9mm ply. However, I would suggest it's a question of balancing desirability of a feature with cost and whether it might add value to the boat on resale. I wonder if your proposed locker will provide any real benefit over the original sealed bin design. Yes, it's true that there's a lot of inaccessible wasted space around the Reedcraft bin lockers, but what else would you put in larger locker space? My father's Reedcraft SeaHawk was supplied from new with the aft of its starboard cockpit locker cut away so the supplied Yamaha outboard could be stored in it. It also had a crude wooden hatch fitted. It kept the outboard out of sight when the boat was left on its mooring but provided little real security as it could have been broken into easily. The port locker was just the standard open "bin". Other than the motor only spare outboard fuel, fenders and rhond anchors were kept in the lockers - oh yes, the smelly Origo methylated spirit stove was normally kept there when not in use in the cabin. In short, the smelly stuff and kit you needed when mooring was all that went in the cockpit lockers. You don't really want fumes from fuel, cooker or engine, getting into the cabin, which is why, on a Broads-based boat at least, the original bins of a Reedcraft two-berth that kept stuff only used outside the cabin totally separated from sleeping bags, spare clothing and stuff you want to keep dry. They were all stored in the cabin in the space the under the cockpit benches. Given that your plan for a plywood floor seems sensible. I would have thought the thinnest possible board would be all that is needed, providing some strengthening ribs were provided to stiffen it. As you'll have seen, I fitted carpet tiles in my cabin and didn't notice the loss of headroom. The "Formica" I obtained was only about 3mm thick, just a veneer that provided a maintenance-free wipe down surface to whatever it was glued to.
Greg Chapman
GregAfloat - My Boating Biography |
|
|
This post was updated on .
In reply to this post by Countrysideguy
Well, here is a long overdue update on Pippin, as today I floated her for a third season on Ullswater, Cumbria. She is 50 this year and still going strong, but not looking how you might think.
In 2023, she had some time sailing again, on Ullswater. I don't believe she had sailed in a long while. I thought it was wonderful, although, with her drop keel sealed, getting up wind was very limited, although possible. She would still be fun enough on a beam even if she'd not point much higher. But, my wife wasn't all that interested in sailing. Most of the time, with guests aboard, the boat became a floating small venue for a broader day of walking, Kayaking, paddle boarding, bbq's and so on. Pippin would provide our berth, for up to four of us and two dogs! So 2024 came along and I decided to make Pip just a little more practical for our needs. I did what some might consider the unthinkable, and/or perhaps the inexcusable. Pippin became a small cabin cruiser, dismast, and with a section of the cabin roof removed and rebuilt higher. She now has a wheel, but can be tiller helmed too. I took a long time making this decision. Knowingly destroying a good boat. Yet, arguably I have extended her lifespan, repurposing her, as a vessel that can now comfortably sleep us for a number of nights on the lake. Now, 2025, and I have come to really appreciate Pippin as a project that is continually ongoing. So many members of my family and friends have become a part of Pip, and share in my love for her. I'm glad I had a chance to sail her, and glad I regularly get to use her, to create memories and have great amounts of fun on Ullswater. Pippin has had a great life, and I am invested in keeping that going, even if it doesn't always financially make sense. In a weeks time, she will even have an externally located tool box style deisel heater to plug in, which I am determined to make smart of. The idea being to plug the exhaust in to a fixture mounted on the gunwale, and the hot air pipe be plugged into the cabin thru a vent with removable lid. This shall make it all the more comfortable in the cooler nights, and the dry hear will certainly help keep moisture down. I shall also be having a brand new trailer made for her this year, since her current one is on the brink of collapse and certainly not towable. Please see attached photos. I appreciate some SeaHawk owners may be a tad saddened, but I'm sure can see that in this instance, Pippin has been given a good lease of life. She was even used as my means of getting to Howtown for my wedding in October 2023. She is family. P.S of the owner of Charlotte is ever out on the lake from Glenridding Sailing Centre, I'd love to have a chat. I'm berthed in Rumneymead Harbour down Pooley end. 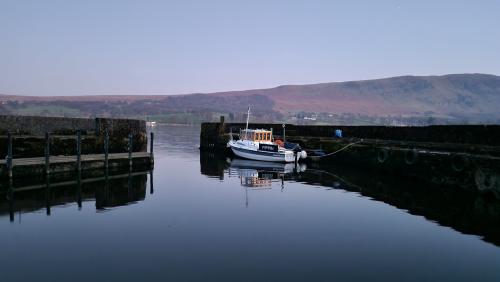 Rumneymead Harbour 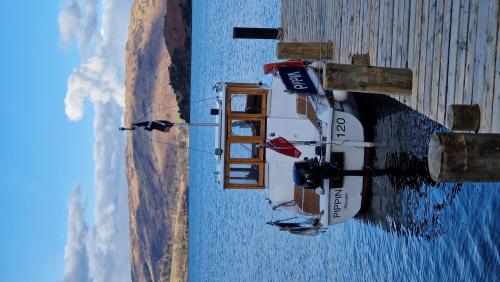 Inn on the Lake, Glenridding 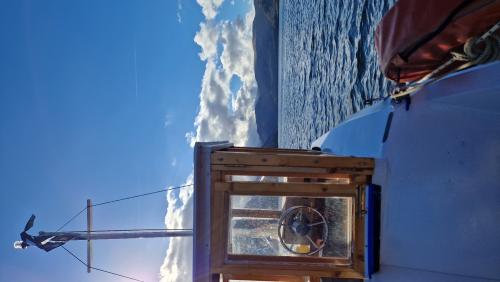 Heading to Glenridding 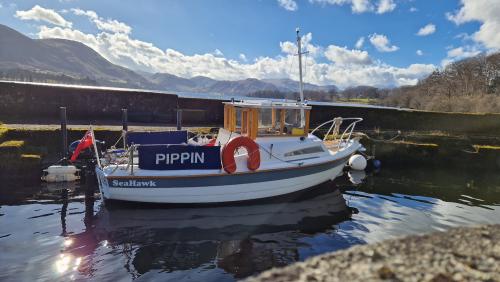 Rumneymead Harbour  Rumneymead Harbour 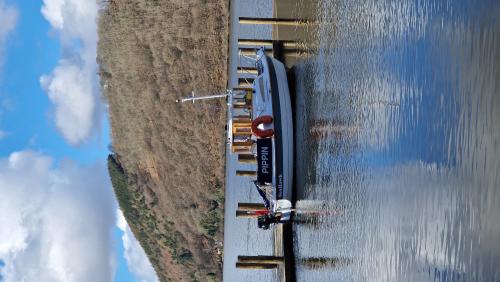 Park Foot, Pooley Bridge 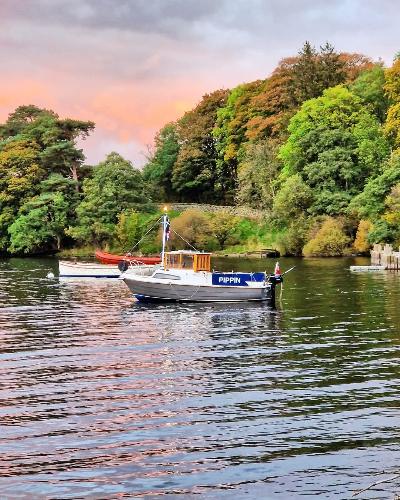 2024 Season - Switched to a grey Hull and new cabin extension 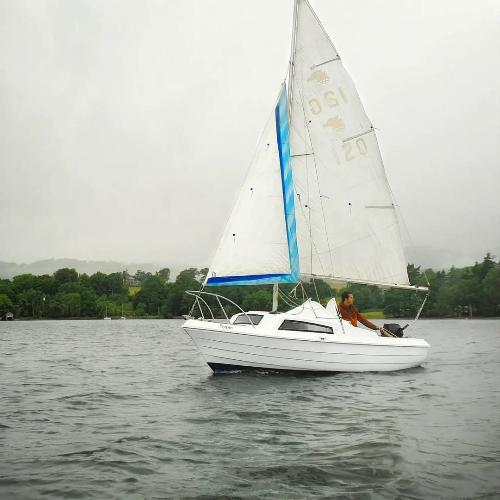 Sailing 2023 season 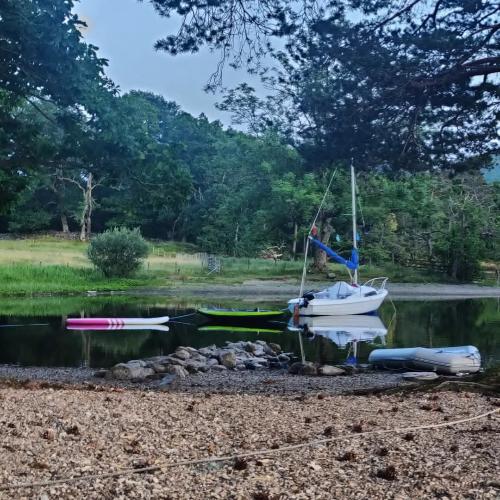 Night on the lake 2023 season 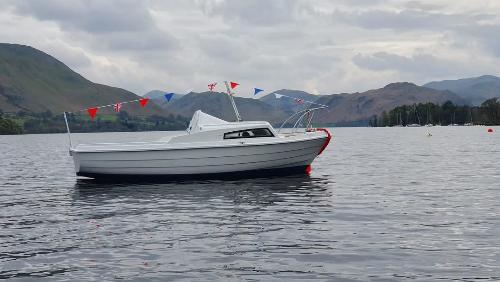 First time on the water 2023 season, before I put the mast back on
Michael
Pippin #120 - Ullswater, The Lake District |
«
Return to Help Desk
|
1 view|%1 views
| Free forum by Nabble | Edit this page |